Sunday, 19 January 2014

Nyx - Dorothy Swatch

Nyx - Dorothy Swatch

Short post today, a quick review of Nyx - Dorothy. 
I bought this polish in Warsaw this summer, and waited for the winter to use it because it is not a summer polish at all in my opinion. 

This polish has hexa & small squared red glitter, in a black sheer base. It's not a gelly base, just sheer. For that reason I layered it over one layer of a black polish underneath. Also, it reminds me of Revlon - Scandalous. I layered a top coat on top, and it made it look a lot prettier than without. 

It's not as pretty as I thought it would be, but still a very nice polish, very vampy & wintery. If you like that kind of look, I would recommend this to you. As for me, it's nice, but it didn't blew me away. 
You can find it, like all Nyx products in cherryculture.com.
Thank for visiting! :) have a great week. 

פוסט קצר היום, עם סקירה קצרה ללק Nyx - Dorothy.
את הלק הזה רכשתי בחנות של ניקס בוורשה בטיול שלי בקיץ, וחיכיתי לחורף להשתמש בו כי זה לק חורפי ולא קיצי כלל בעיני. 

הלק מורכב מגליטרים אדומים משושים וריבועים קטנים, בבסיס שחור שקוף למדי. לא ג'לי, פשוט שקוף יחסית. לכן מרחתי אותו מעל שכבה אחת של לק שחור. הוא מאוד מזכיר לי את  Revlon - Scandalous שגם ניתן למצוא בארץ. מרחתי מעל טופ, וזה עשה הבדל לטובה ונראה יותר חלק ומבריק עם טופ. בלי טופ הוא נראה מעט גושי. 

הוא לא יפה כפי שדמיינתי שהוא יהיה, אבל עדיין זה לק נחמד. מאוד ערפדי וחורפי, למי שאוהבת את המראה אני ממליצה על הלק. לדעתי הוא נחמד, אבל לא עפתי מה שנקרא. 
ניתן לרכוש אותו, כמו את כל המוצרים של ניקס באתר cherryculture.com.

תודה רבה שקראתן, שיהיה שבוע נהדר. 

Nyx - Dorothy Swatch

Nyx - Dorothy Swatch

Nyx - Dorothy Swatch


Friday, 17 January 2014

Barry M - Dark Green with Pueen Plates Design

Barry M - Dark Green with Pueen Plates Design (pueen46)

I actually really love today's design and really happy to share it with you! 
The main focus of this post is these my brand new Pueen plates! 

I ordered this set about two months ago and it took forever to arrive. I thought about asking for a refund, and suddenly they arrived. 

They were also not cheap at all relativly to cheeky plates, that ship free world wide or bundle monster that offers really low shipping fee. So these are two serious down sides to these plates, and if they weren't so AMAZING I would not bother to pay so much. But... since they came out I've been in love with these and wanted them so much, so I bought them in the end and glad that I did because they are so many beautiful designs. 

Also, as you can see in the picture bellow I got both of the available Pueen sets (Love Elements & Sumptous Gallery) because they are both have so many pretty designs and I just couldn't decide between the two.  

Another plus side to these that they come in a beautiful display storage case. This is super convenient and just a great thing to have. I think it's great to get these especially when you pay so much for the shipping and wait for so long, you better be satisfied with the product you receive in the end. 

I won't do a full review of these because it is not a new product and you have some great reviews online. Here is a great review of Love Elements set by chitchatnails, and a review of sumptous gallery.

אני ממש אוהבת את העיצוב בפוסט של הפעם ושמחה מאוד לחלוק אותו אתכן!
הפוקוס העיקרי של הפוסט יהיה שני הסטים של Pueen החדשים שלי!

הזמנתי את שני הסטים הללו לפני כמעט חודשיים, וכפי שאתן מבינות, לקח להן המון המון זמן להגיע. חשבתי כבר שלא יגיעו ולהתחיל תהליך זיכוי מול פייפל, אבל לבסוף הגיעו. 

הדסקיות הללו לא זולות בכלל לעומת סטים אחרים של דיסקיות בשוק כמו של צ'יקי שמציעים משלוח חינם לכל העולם, ושל בנדל מונסטר שמציעים מחיר משלוח נמוך במיוחד. אז שני הדברים הללו הם שני חסרונות דיי רציניים לסטים האלו ואם העיצובים לא היו כאלה מדהימים לא הייתי טורחת כל כך. אבל... מאז שהדיסקיות הללו יצאו במהלך שנה שעברה אני לא מפסיקה להזיל ריר על העיצובים המדהימים שבנות מעלות איתן, אז החלטתי לקנות אותן. אני כ"כ שמחה שעשיתי את זה כי יש בהן כל כך הרבה עיצובים יפים.

כפי שאתן רואות בתמונות למטה, רכשתי את שני הסטים שמוצעים למכירה באתר של Pueen Cosmetics, הראשון נקרא Sumptous Gallery והשני Love Elements. שניהם מהממים ולא הצלחתי להחליט בין השניים אז הזמנתי את שניהם. 

עוד נקודה חיובית היא שהסטים מגיעים בתוך תיקיית אחסון קטנה, שגם מאפשרת רפרוף נוח בין הדיסקיות השונות. זה כ"כ נוח ופשוט דבר מצויין כשרוצים לבחור איזה דוגמא להוסיף כדי לשדרג את המניקור. ובעיקר זה יפה שזה מגיע כך, כי לאחר מחיר יחסית גבוה לסט ולמשלוח וזמן המתנה כ"כ ארוך, כדאי שבסוף המוצר יהיה שווה את ההשקעה. 

לא אסקור את הסטים כי המוצר לא חדש, וכבר קיימים לא מעט סקירות נהדרות ברשת. הנה סקירה של הסט sumptous gallery ועוד אחד של Love Elements, שניהם של הבלוגרית הנהדרת chitchatnails. 

pueen stamping plates

Barry M - Dark Green with Pueen Plates Design (pueen46)

I created this design the day I got these I just couldn't resist! 
As a base I used Barry M - Dark Green, which is a great cream from Barry M gelly series. The formula is amazing, all the polishes that I've tried from this series has a great formula. I used two coats for full coverage. 

I used Barry M - Silver Foil to stamp this lovely design from Pueen46 plate. On top I added just some silver holo glitters in the middle of the sort of spiral shape. 

Thank you so much for reading and I'll see you soon! 

עשיתי את העיצוב הזה ביום שקיבלתי את הדיסקיות, לא יכולתי לחכות! 
כבסיס השתמשתי ב - Barry M - Dark Green שרכשתי בלונדון. הוא מסדרת ה- gelly של בארי אם, לכל הסדרה פורמולה נהדרת ומכל לק שניסיתי התרשמתי מאוד. מרחתי שתי שכבות לכיסוי מלא. 

השתמשתי בלק Barry M - Silver Foil על מנת להחתים את הדוגמא החמודה מדיסקית Pueen46. מעל הוספתי סתם גליטר כסוף הולוגרפי, באמצע הצורה הספירלית. 

תודה רבה שקראתן, ונתראה בקרוב בפוסט הבא :) 

Barry M - Dark Green with Pueen Plates Design (pueen46)

Barry M - Dark Green with Pueen Plates Design (pueen46)


Monday, 13 January 2014

OPI - Do You Lilac It: Swatch & Design


purple nails with OPI - Do You Lilac It

For this nail art I used *OPI - Do You Lilac It? It's a very springy sort of color, but sometimes it's nice to go for a lighter color in the middle of the winter!
I first Swatched it on it's own for you guys to see the color. Very nice purple, nothing that we haven't seen before, but still, good color, good formula, everyone need a color like that in their collection. I have a very similar color by Sinful colors, that I used in this design.

לנייל ארט הפעם השתמשתי בלק OPI - Do You Lilac It?*. הסגול בגוון אביבי למדי, אבל לפעמים זה נחמד לשים צבע בהיר יותר סתם ככה באמצע החורף! 
עשיתי סווץ' של הצבע לבדו כדי שתוכלו להתרשם מהצבע. הגוון הסגול מאוד נחמד, לא משהו שלא ראינו בעבר, אבל עדיין, גוון יפה, פורמולה מצויינת, וזה צבע שכל אחת צריכה באוסף הלקים שלה. יש לי לק מאוד דומה של sinful colors  שהשתמשתי בו בעיצוב הזה. 

OPI - Do You Lilac It swatch

OPI - Do You Lilac It swatch

For the design I left the thumb & the index finger plain. On the middle finger nail I applied a holographic purple by Pupa. On the ring finger I applied one coat of the Barry M - Diamond Glitter, that has hexagon & tiny silver holo glitter. And on the pinky, I stamped a nice little butterfly design with Orly Wild Wisteria. 
Thank for reading! Have a great week! 

לעיצוב המעניין יותר, השארתי את האגודל והאצבע כמו שהן. על האמה מרחתי לק הולוגרפי סגול של פופה. 
על הקמיצה מרחתי מעל הלק הסגול את  Barry M - Diamond Glitter שהוא גליטר הולוגרפי כסוף, עם גליטרים משושים בינוניים וקטנים. ולבסוף על הזרת החתמתי את דוגמת הפרפרים החמודים עם Orly Wild Wisteria.
תודה רבה שקראתן, ושיהיה שבוע נפלא! 

purple nails with OPI - Do You Lilac It

purple nails with OPI - Do You Lilac It

*product provided for review; המוצר התקבל לסקירה


Saturday, 11 January 2014

About Matte Top Coat.. (And A Wintery Matte French Manicure)


Matte French Manicure

I got this Matte top coat by OPI* for review, and I thought to my self - I already have the Essie - Matte about you that I bought a while ago, what could be any different about this one?. Well, It managed to surprise me because it was awesome!

First of all, The Formula - OPI Matte top coat is a lot less milky than the Essie one, and the whole formula is less thick and easier to work with. Secondly, OPI dries a lot quicker, and I mean a lot! I can't Imagine myself using Essie Matte about you again after I've tried this one by OPI. It is ten times better! 

I can't tell you anything about how long it is lasting but matte coats are not meant to extend how long the polish is lasting, they just help to create the matte finish. If I want the manicure to last long what I do id first put on a regular top coat like Seche Vite, and then after it dries I apply the matte one. That way you can get both effects - long lasting and beautifull matte finish for your polish. 

For this post's mani I created a Matte French Manicure! 
The base color I applied two coats of this cream dark burgundy purple by wow cosmetics 313. I think this is such a gorgeous color for winter and it really looks great with a matte finish. Then I applied OPI Matte top coat just on the tip. I actually did not move the brush from one side of the nail to the other, I held the brush still and turned my finger. I find it easier and less "shaky" to do a french tip this way. 

That's all for today thank you very much for reading! I would love to read about your experience with Matte top coats - the ones I mentioned or others.. :) 

כאשר קיבלתי את הטופ מאט של OPI* לסקירה,  חשבתי לעצמי - יש לי כבר טופ מאט של אסי בשם Essie - Matte about you שרכשתי בסופר פארם, עד כמה המוצר הזה כבר יכול להיות שונה ממנו?. אז מסתבר, שהמון! הוא הפתיע אותי ממש לטובה והוא פשוט אדיר! 

תחילה, אציין את הפורמולה, של OPI הרבה פחות חלבית מאשר הפורמולה של אסי, ובכלל הפורמולה הרבה יותר נוחה לעבודה. שנית, OPI מתייבש משמעותית מהר יותר מאסי, ההבדל הוא עצום. עם אסי חיכיתי יחסית הרבה זמן שיתייבש ופה באמת שתוך 5 דקות הכל היה יבש לחלוטין. אני לא מצליחה לדמיין את עצמי משתמשת שוב בטופ של אסי אחרי שניסיתי את של OPI. הוא הרבה יותר מוצלח! 

אני לא יכולה לתת חוות דעת על העמידות של הלק עם הטופ הזה כי לא בדקתי אותה, אבל למיטב הבנתי טופ מאט לא אמור להאריך עמידות כמו שחלק מטופים אחרים מבטיחים לעשות, אלא פשוט להעניק את הגימור המאט. הטיפ שלי להאריך עמידות הוא פשוט למרוח טופ רגיל, ולאחר הייבוש למרוח את הטופ מאט לגימור. ככה תקבלו את שני האפקטים - עמידות וגימור מאט! 

לפוסט הזה יצרתי מניקור פרנץ' מאט. הלק ששמתי בבסיס הוא Wow Cosmetics 313, שהוא לק קרמי בגוון סגול בורגונדי כהה. אני חושבת שזה צבע נהדר לחורף וכן שנראה מעולה עם גימור מאט, מדגיש את המראה ויוצר לוק מאוד קלאסי ויפה. אז כצפוי, מרחתי מעל על הטופ מאט של OPI. למעשה לא מרחתי את זה על ידי העברת המברשת מצד לצד, אלא השארתי את המברשת במקום וסובבתי את האצבע עצמה. אני חושבת שיותר קל ליצור ככה קו ישר ובלי רעידות. 

אז זהו להיום! מקווה שנהנתן מהפוסט ותודה שקראתן, ואני אשמח לשמוע על ההתנסות שלכן עם טופ מאט, של החברות שציינתי או אחרות (אני יודעת שיש אחד של שיק שלא הזדמן לי לנסות עדיין..) 


Matte French Manicure

Matte French Manicure

Matte French Manicure

*Product provided for review; המוצר התקבל לסקירה

Friday, 10 January 2014

Guest Post: Paint Them All with Two Glitter Gradient's

Hello Everyone! Today is a very special post, my first guest post by Yael from Paint Them All blog. I follow her since the day she started her blog and love her design and gorgeous nails! I wish my nails were this long! I hope you enjoy this post and see you all very soon. 

היי לכולן! היום יש פוסט מאוד מיוחד, הפוסט אורח הראשון שאני מארחת כאן בבלוג, של יעל מהבלוג Paint Them All. אני עוקבת אחרי יעל מהיום שהיא פתחה את הבלוג, אוהבת מאוד את הסגנון שלה ואת הציפורניים המהממות שלה! הלוואי והיה לי כזה אורך!! מקווה מאוד שתהנו מהפוסט וניפגש בפוסט הבא בקרוב. 

*****

Hi guys!
It's so great to be here on Jordan's blog! I've been a follower of hers for a really long time and I absolutely love her style:)
I chose to do a glitter gradient because I know it's one of her favorite looks. I started with 2 coats of Essie Skirting the Issue, then created a gradient using one of my favorite nail polishes: A-England She Walks In Beauty.
שלום לכולם!
אני ממש שמחה שיש לי הזדמנות להתארח כאן בבלוג! אני קוראת קבועה שלה ומאוד אוהבת את הסגנון שלה :)
בחרתי להכין גליטר גרדיאנט כי אני יודעת שזה אחד הסגנונות האהובים שליה. התחלתי עם 2 שכבות של Essie Skirting the Issue, ואז יצרתי את הגרדיאנט עם אחד מהלקים האהובים עליי: A-England She Walks In Beauty.

glitter gradient with Essie Skirting the Issue & A-England She Walks In Beauty

glitter gradient with Essie Skirting the Issue & A-England She Walks In Beauty

glitter gradient with Essie Skirting the Issue & A-England She Walks In Beauty

I wore this simple look for a few days and enjoyed it a lot, so I decided to create a similar version using a cool-toned color comination. This time I went with 2 coats Ga-de Military Style as by base, and Ciate Locket for the gradient. On my ring finger and thumb I used one coat of NYX Gilded Glitter.

הייתי עם העיצוב הזה במשך כמה ימים ומאוד נהניתי ממנו, אז החלטתי ליצור גירסא דומה, הפעם עם צבעים קרים יותר. התחלתי עם 2 שכבות של הלק Military Style של ג'ייד, ויצרתי את הגרדיאנט בעזרת Locket של סיאטה. על הקמיצה והאגודל מרחתי שכבה אחת של Nyx Gilded Glitter.

Glitter Gradient with Ga-de Military Style & Ciate Locket

Glitter Gradient with Ga-de Military Style & Ciate Locket

Glitter Gradient with Ga-de Military Style & Ciate Locket

Thanks so much for reading, and thank you Jordan for having me!


תודה רבה שקראתם, ותודה על האירוח!

Saturday, 4 January 2014

Hello after a long absence + Giveaway Winner!

Well, Today's post is not going to be very interesting, plus it is going to be very short.
I just wanted to apologize for my absence the past two weeks, I was visiting my family abroad and had a few busy days since I came back home and to work. So yeah... sometimes life happens, and there isn't much time for blogging or for nails.

But I'm back now, already painted my nails and next week I will post regularly!
Also, I didn't announce the winner of the Moon Sugar Decals Giveaway! I did notify the winner already, but I also wanted to let you guys know that there was a winner and everything is OK :).

And one last thing! This is month is my blog's two years anniversary! so expect another giveaway soon :)
Have a great week ya'll and see you soon!

טוב אז הפוסט היום לא יהיה מעניין במיוחד ולכם גם יהיה מאוד קצר! 
אני רק רציתי להתנצל ולהסביר את ההעדרות שלי בשבועיים האחרונים, ביקרתי משפחה בחו"ל, וכן גם היה שבוע עמוס מאז שחזרתי הביתה ולעבודה. אז כן... לפעמים החיים מפריעים לנהל את הבלוג, ואפילו ללק! חח כן כן היה לי שבוע כזה עמוס שהסתובבתי שבוע עם לק עם צ'יפים ולא הורדתי! 

בכל אופן, אני פה עכשיו, כבר חידשתי את הלק, ובשבוע הבא אפרסם פוסטים ברגיל. 
וגם, רציתי להודיע על הזוכה בהגרלה שהייתה בבלוג למדבקות מים של Moon Sugar Decals. 
כמובן שהודעתי כבר לזוכה אבל רציתי גם לכתוב כאן שהייתה זוכה ושההגרלה הסתיימה ושהכל בסדר. 

ודבר אחרון! למעשה הבלוג חוגג החודש יומולדת שנתיים, אז תצפו לעוד הגרלה מגניב בקרוב :) 
וזהו, שיהיה לכולן המשך שבוע מצוין! 

a Rafflecopter giveaway

Friday, 20 December 2013

Moon Sugar Decals Review + Giveaway!

Moon Sugar Decals Review + Giveaway!

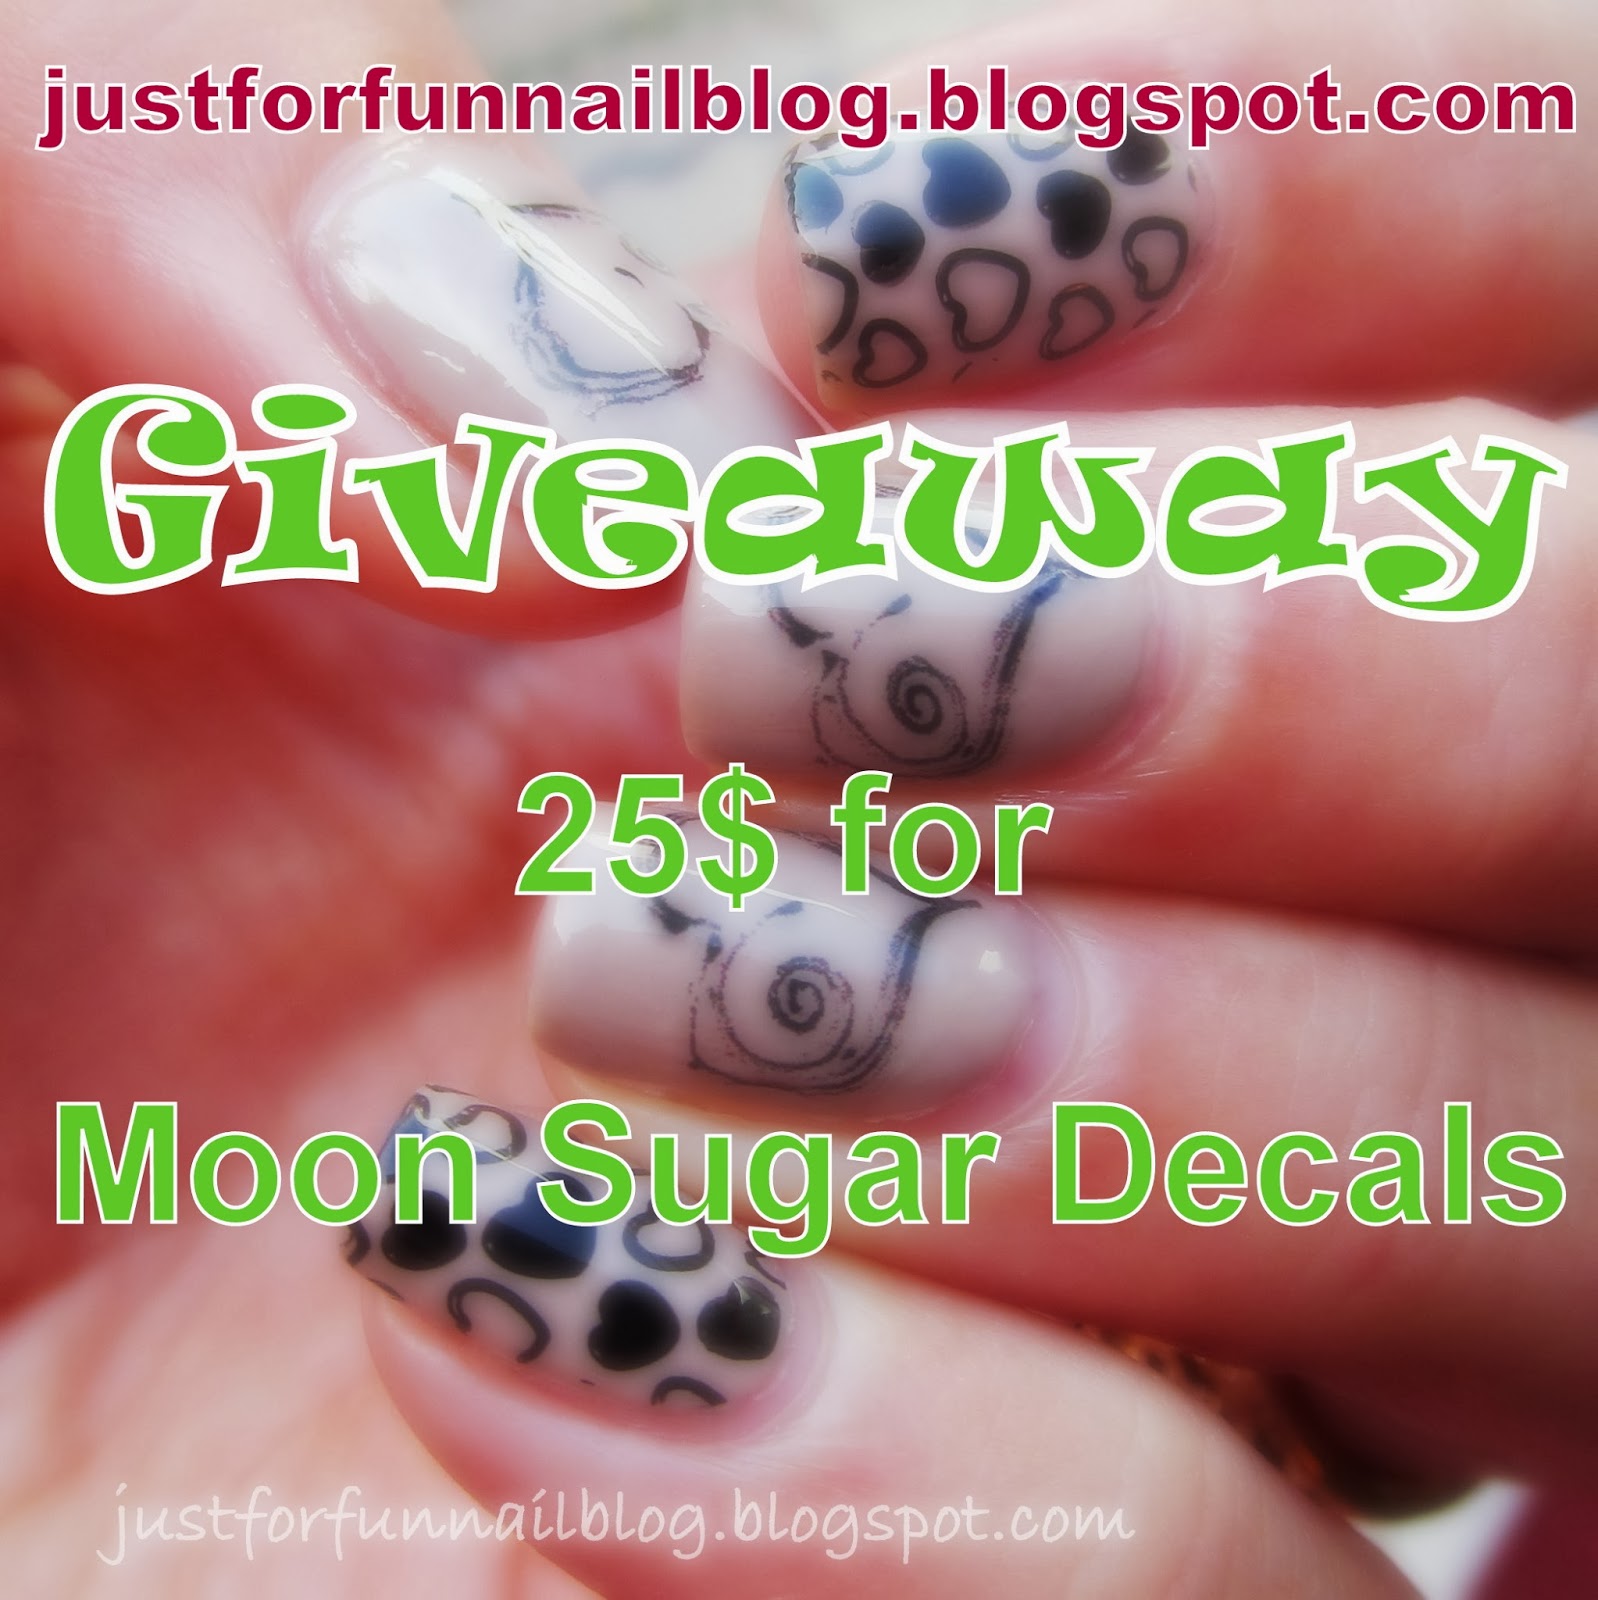
This lovely delicate manicure was created with Moon Sugar water decals. I must admit, this is only my second time using water decals ever (!!) and the first time feeling confident enough to put it up on the blog. I did have to look up tutorials, and I knew it's suppose to be easy to use from posts & tutorials I've seen before. So after watching these two videos (1) (2), I was ready to try it myself. 

On my first try I didn't do so well, because I put on the decals the other way round, but on my second try I got it right. I was a bit worried about using decals, but I really like them now! I'm looking forward to try more of these. 

So these are the water decals* that I used. The base polish is Wow Cosmetics 440, just a creamy nude polish. And the hearts stamp on the pinky & index finger is from DRK-A stamping plate.  

את המניקור המקסים והעדין הזה יצרתי באמצעות קעקועי מים של Moon Sugar Decals. אני חייבת להודות שזוהי רק הפעם השניה (!!) שאני משתמשת בקעקועי מים, והפעם הראשונה שאני מרגישה בטוחה מספיק על מנת לשתף את התוצאה בבלוג. לפני שניסיתי בעצמי, הייתי צריכה להסתכל קצת במדריכים, וידעתי שהשימוש בהם אמור להיות פשוט מפוסטים ומדריכים שקראתי בעבר. אז לאחר שצפיתי בשני המדריכים האלו (1) (2), הייתי מוכנה לנסות בעצמי. 

הניסיון הראשון שלי לא צלח, מכיוון שהנחתי את הקעקוע עצמו הפוך! אבל בניסיון השני כבר הצלחתי לבצע את ההנחה כמו שצריך. קצת חששתי מהשימוש בקעקועי מים, אבל כעת אני ממש מחבבת אותם! אני ממש מחכה לנסות אותם שוב. 

אני השתמשתי במניקור בקעקועי מים האלו בצורת לב. לק הבסיס הוא של וואו מס' 440, לק קרמי בצבע ניוד. וחותמת הלבבות על האצבע והזרת היא מהדיסקית DRK-A. 

 Moon Sugar Decals Review + Giveaway!

Moon Sugar Decals Review + Giveaway!

Moon Sugar Decals Review + Giveaway!


And as promised - a Giveaway! 

Moon Sugar Decals are being so generous and giving away 25$ to purchase water decals in their site. 
The giveaway is open internationally. All you have to do are these four simple steps: 
1. Like Moon Water Decals Page on Facbook 
2. Like my Blog Page on Facebook
3. Follow the blog on GFC 
4. Leave your email address so I can contact the winner

There are more options to gain more points once you do these 4 mandatory steps. 
The Giveaway is open for 10 days until the 30'th of December! The winner will be anounced on the 31'th! :) 
Good luck to you all! :) 

Moon Sugar Decals היו כה נדיבים ואחת מכן תוכל לזכות ב25$ על מנת לרכוש קעקועי מים באתר שלהם! 
ההגרלה פתוחה לכל העולם, וכמובן גם בארץ :) כל שצריך לעשות הוא 4 שלבים פשוטים: 
1. לעשות Like לעמוד של Moon Water Decals
2. לעשות Like לעמוד הבלוג שלי בפייסבוק
3. לעקוב אחר הבלוג שלי דרך Google Friend Connect
4. להשאיר כתובת מייל על מנת שאוכל ליצור קשר עם הזוכה

לאחר שמבצעים את ארבעת האפשרויות האלו, יש עוד אופציות על מנת להגדיל את הסיכויים לזכות. 
ההגרלה פתוחה ל-10 ימים עד ה-30 לדצמבר, ולאחר מכן אכריז על הזוכה ואצור קשר במייל :) 
בהצלחה לכולן! :) 

a Rafflecopter giveaway
*product provided for review; המוצר התקבל לסקירה


LinkWithin

Related Posts Plugin for WordPress, Blogger...